Engine unit removal
- Remove hood
- Remove radiator assembly (See page CO-22 )
- Drain engine oil
- Drain fuel from fuel tank
- Remove No.1 air hose
-
Disconnect control cables from throttle body
Disconnect these cables:- Accelerator cable
- Cruise control actuator cable
-
Remove air cleaner and MAF meter assembly
- Remove the 3 bolts.
- Loosen the hose clamp, disconnect the air hose from the intake air connector.
- Disconnect the MAF meter wire from the clamp on the air cleaner case.
- Disconnect the MAF meter connector, and remove the air cleaner and MAF meter assembly.
-
M/T:
Remove drive belt tensioner damper (See page EM-15 ) - Remove drive belt, fan, fluid coupling assembly and water pump pulley (See page CO-7 )
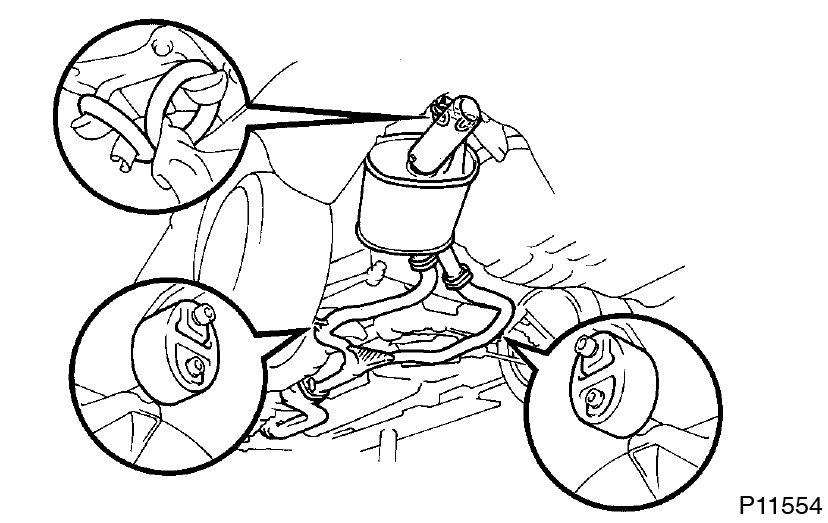
- Remove charcoal canister
- Disconnect heater water hoses
- Disconnect brake booster vacuum hose
- Disconnect EVAP hose
-
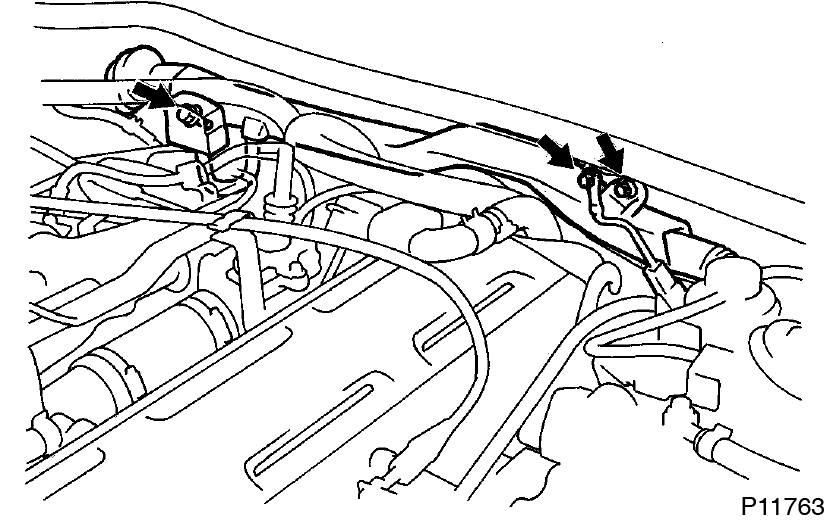
Disconnect wires and connectors
-
Disconnect these connectors:
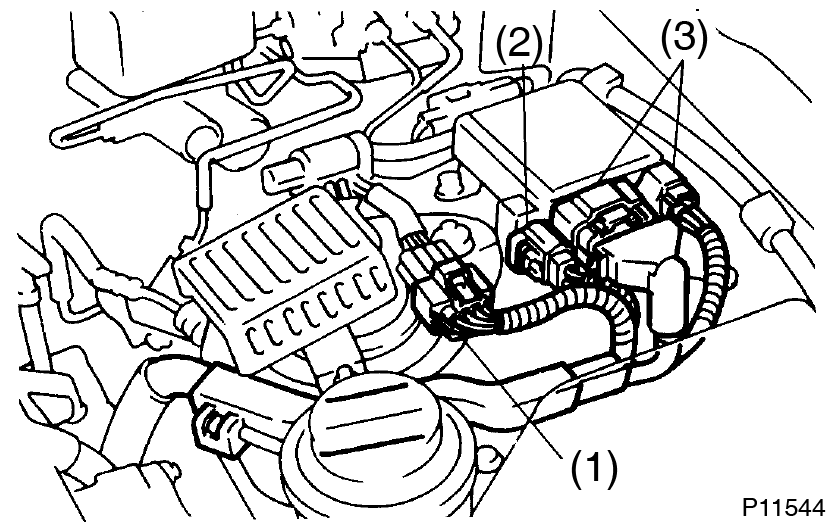
- Solenoid resistor connector
- Noise filter connector
- Igniter connectors
- Disconnect the engine wire from the PS oil reservoir protector
-
Disconnect the connector from the engine room main wire.
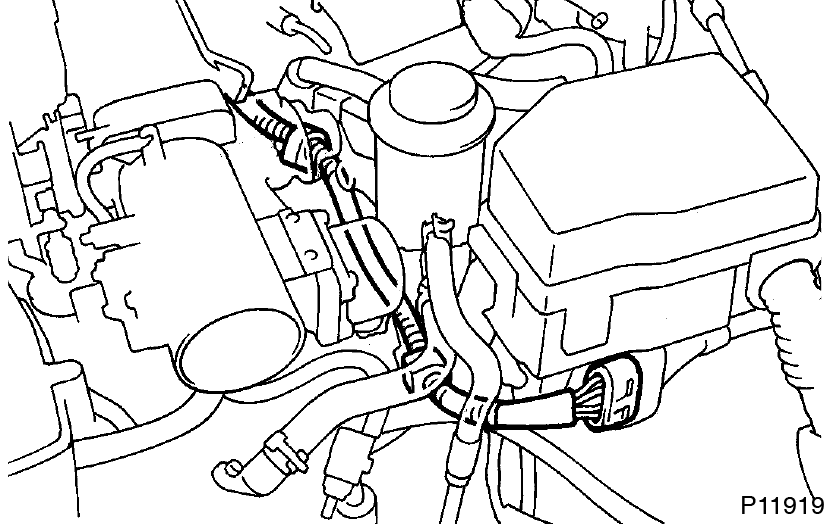
- Disconnect the engine wire from the 2 wire clamps.
- Remove the rubber cap and nut, and disconnect the generator wire.
- Disconnect the wire clamp and PS solenoid valve connector.
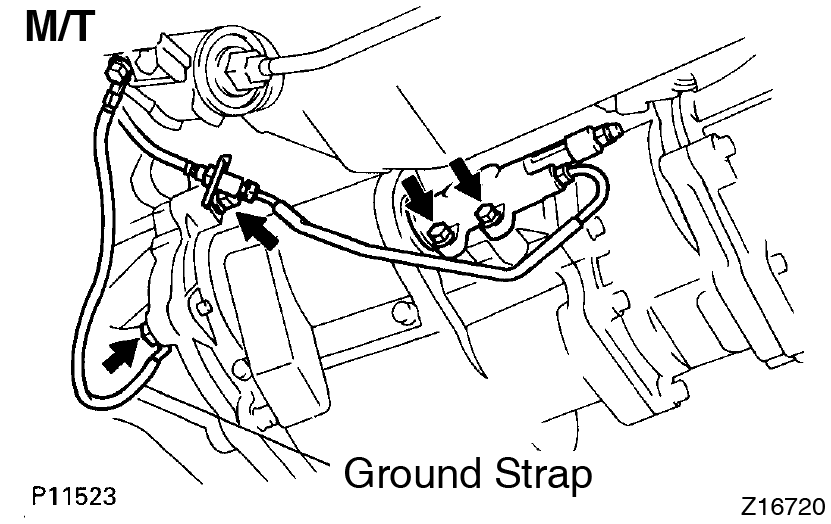
- Remove the bolt and disconnect the ground strap from the cylinder block.
-
Disconnect the starter wire from the LH engine mounting bracket.
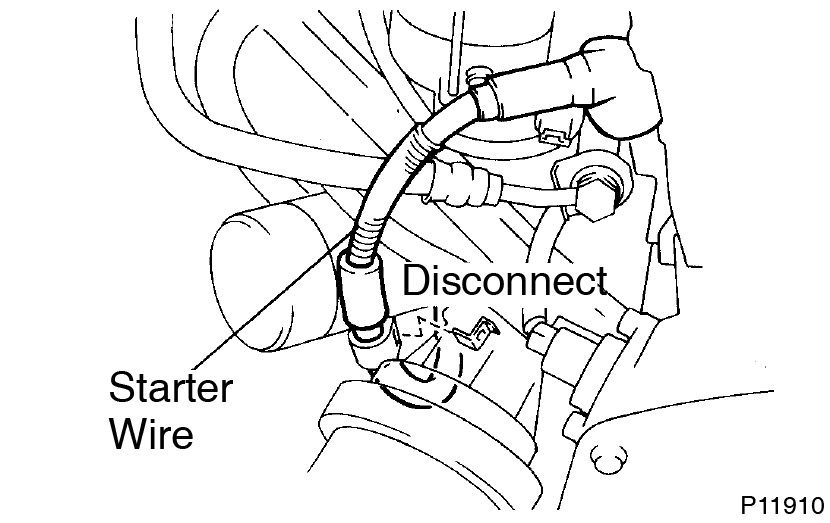
- Remove the rubber cap and nut, and disconnect the starter wire.
-
Disconnect these connectors:
-
Disconnect fuel hoses
-
Remove the union bolt and 2 gaskets, and disconnect the fuel inlet hose.
- Put a suitable container or shop rag under the fuel pipe support.
- Slowly loosen the union bolt.
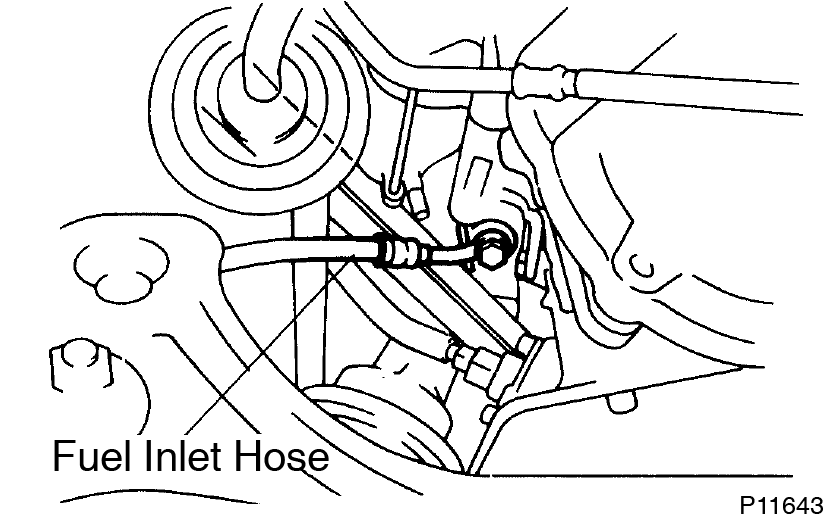
- Suspend the hose union end upward.
-
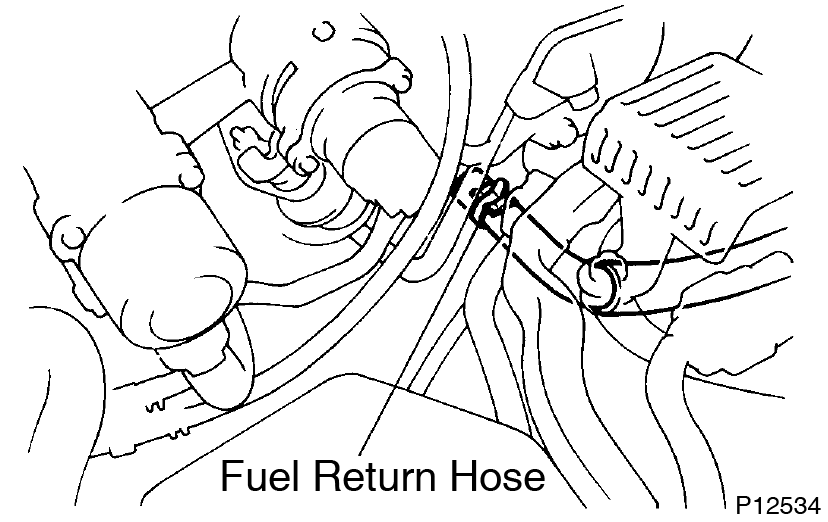
Disconnect the fuel return hose from the clamp of the dipstick guide.
-
Disconnect the fuel return hose from the fuel return pipe.
Plug the hose end.
-
Remove the union bolt and 2 gaskets, and disconnect the fuel inlet hose.
-
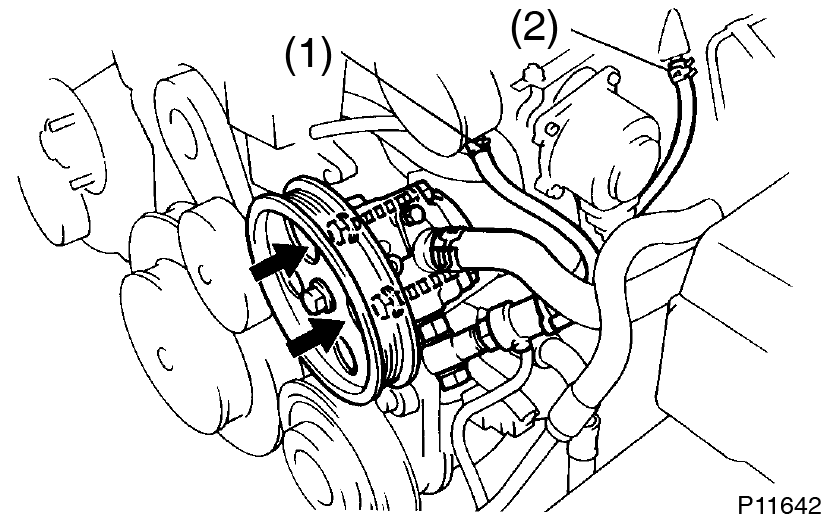
Disconnect PS pump without disconnecting hoses
-
Disconnect these hoses:
- PS air hose from throttle body
- PS air hose from air intake chamber
-
Remove the 2 bolts, and disconnect the vane pump from the pump bracket.
Put aside the vane pump, and suspend it securely.
- Remove the 3 bolts and pump bracket.
-
Disconnect these hoses:
-
Disconnect PS pressure feed hose from engine
Remove the 2 clamp bolts and disconnect the pressure feed hose.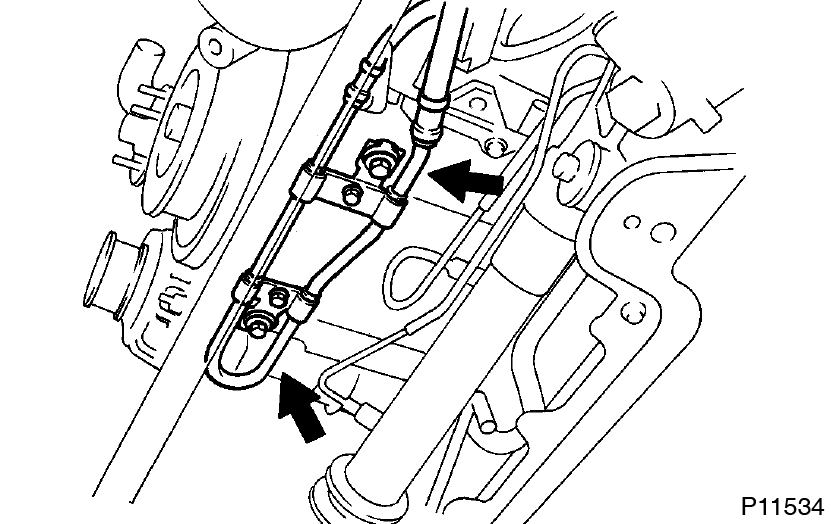
-
Disconnect a/c compressor without disconnecting hoses
-
Remove the 2 bolts.

-
Disconnect the compressor connector.
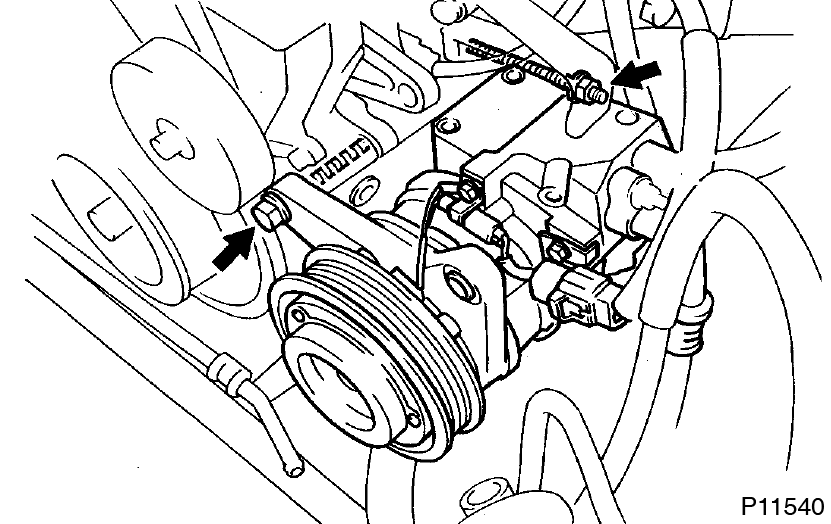
- Remove the bolt and nut.
-
Using a torx socket (E10), remove the stud bolt, and disconnect the compressor from the engine.
Put aside the compressor, and suspend it securely.
-
Remove the 2 bolts.
-
Disconnect engine wire from cowl panel
-
Remove the bolt, and disconnect the ground strap.
- Remove the 2 bolts, and disconnect the engine wire protector.
-
Remove the 2 bolts holding the engine wire retainer to the cowl panel.
-
Remove the bolt, and disconnect the ground strap.
-
Disconnect engine wire from cabin
-
Remove the scuff plate.
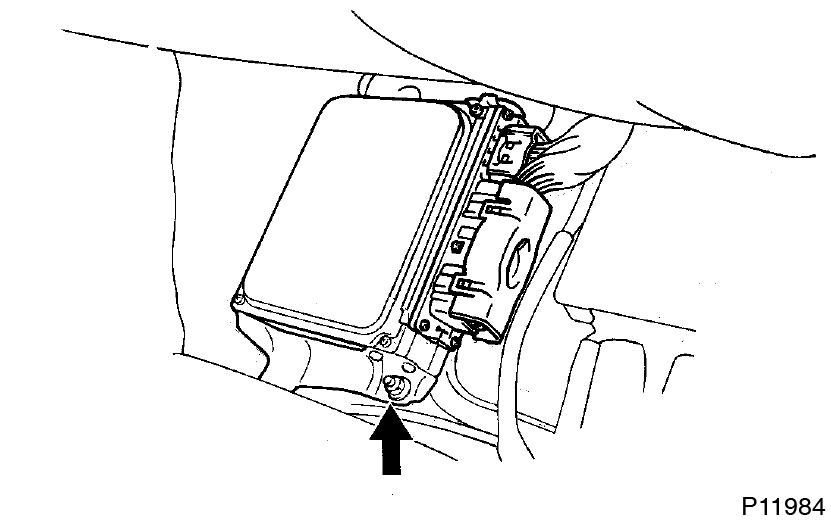
- Take out the front side of the floor carpet.
- Remove the 2 nuts and ECM protector.
- Remove the nut, and disconnect the ECM from the floor panel.
-
Disconnect the 2 connectors from the ECM.

- Disconnect the connector from the TRAC ECU.
- Disconnect the connector from the instrument panel wire.
- Disconnect the 2 connectors from the connector cassette.
- Pull out the engine wire from the cabin.
-
Remove the scuff plate.
-
M/T:
Remove upper console panel, shift lever boots and holding bolts-
Remove the shift lever knob.
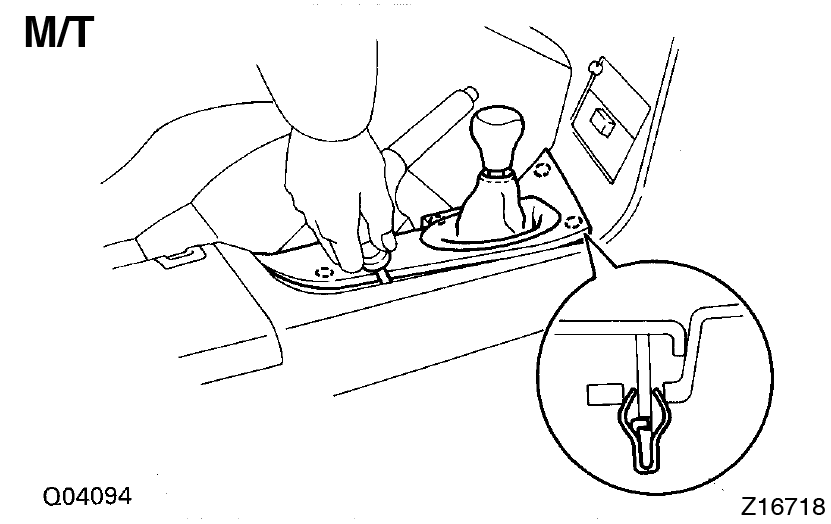
- Using a screwdriver, pry out the upper console panel.
-
Remove the 4 bolts holding the lever boot to the transmission cover.

- Remove the shift & select lever boots.
- Remove the 4 bolts holding the shift lever to the shift lever retainer.
-
Remove the shift lever knob.
-
M/T:
Disconnect clutch release cylinder and ground strap from transmission-
Remove the 2 bolts, and disconnect clutch release cylinder.
- Remove the bolt, and disconnect the clutch line tube.
- Remove the bolt, and disconnect ground strap.
-
Remove the 2 bolts, and disconnect clutch release cylinder.
-
Pdisconnect heated oxygen sensor from front exhaust pipe
Remove the 2 nuts, and disconnect oxygen sensor and gasket.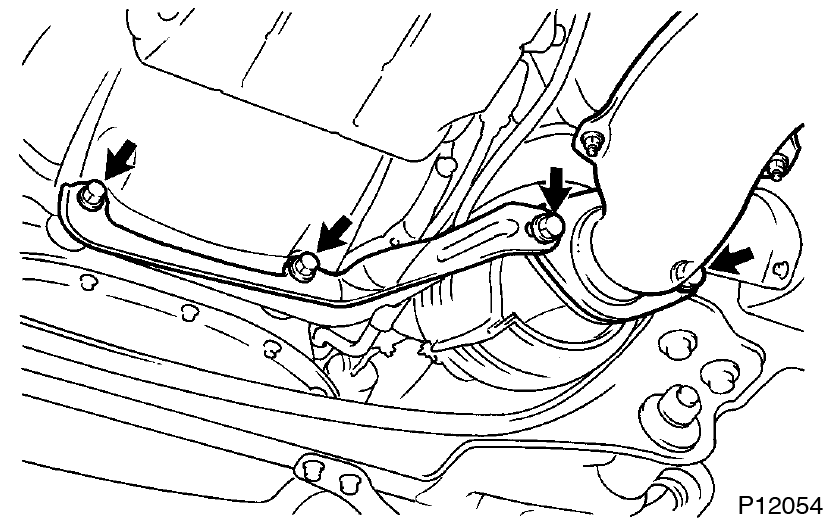
-
Remove exhaust pipe assembly
- Remove the 2 bolts and nuts holding the front exhaust pipe to the No.2 front exhaust pipe.
- Remove the 2 bolts and pipe support bracket.
- Remove the gasket, and disconnect the front exhaust pipe.
-
Disconnect the hook of the tailpipe from the 2 rings.
- Disconnect the 2 rings on the exhaust pipe from the exhaust pipe brackets, and remove the exhaust pipe assembly.
-
Remove No.2 front exhaust pipe
Remove the 3 nuts, front exhaust pipe and gasket.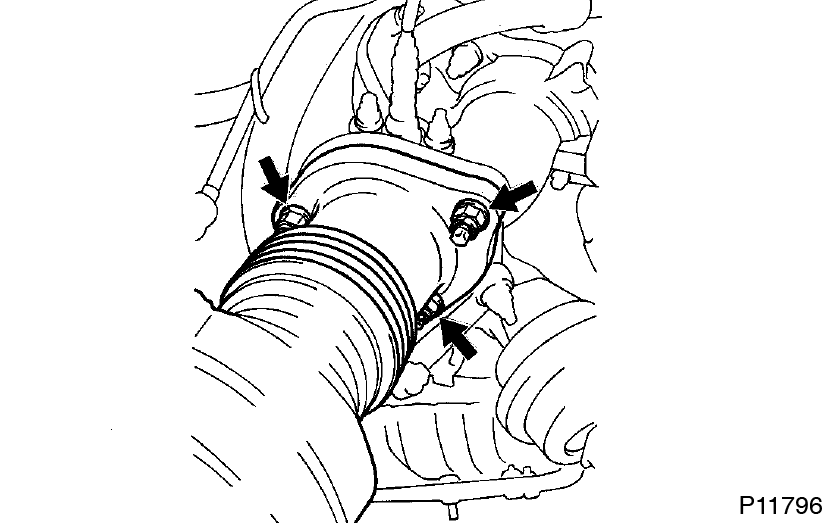
-
Remove exhaust pipe heat insulator
Remove the 4 nuts and heat insulator. -
Remove rear center floor crossmember brace
Remove the 4 bolts (Normal roof) or 6 bolts (Sport roof) and crossmember brace.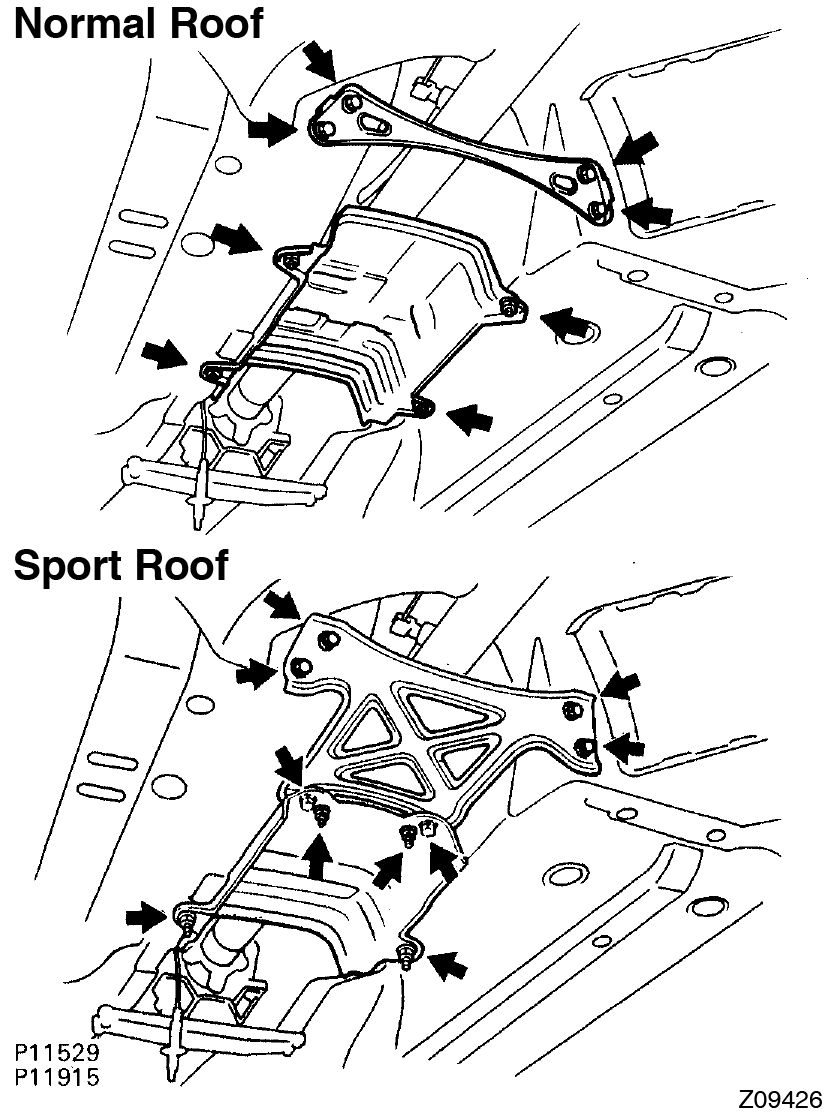
- Remove propeller shaft (See page PR-4 )
-
A/T:
Disconnect transmission control rod
Remove the nut, and disconnect the control rod from the shift lever.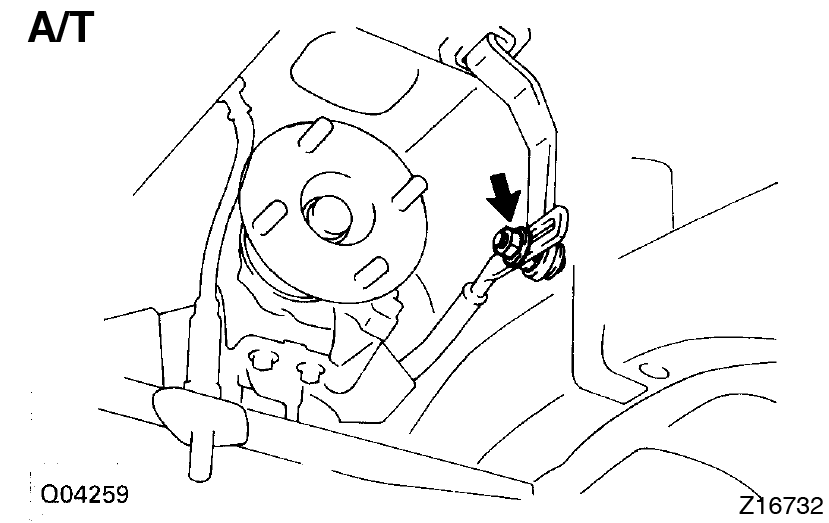
-
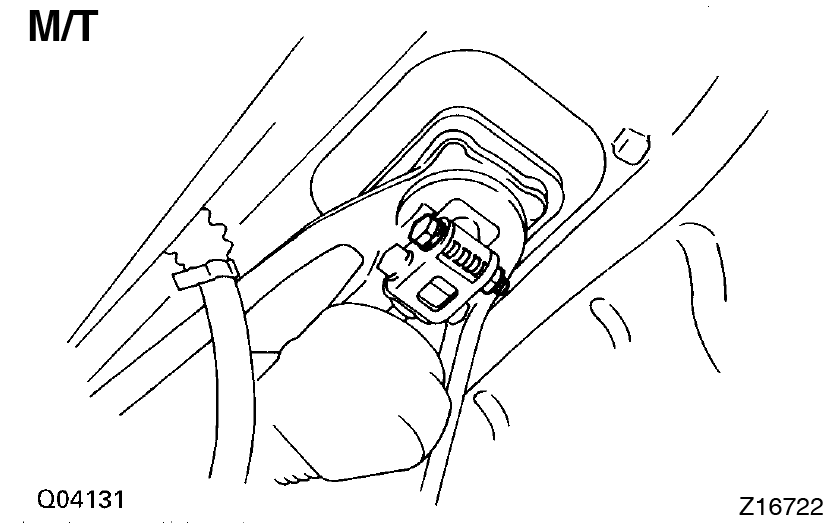
M/T:
Remove transmission shift lever- Remove the bolt and nut.
- Remove the transmission shift lever, inside of vehicle.
-
Place jack under transmission
Be sure to put a wooden block between the jack and the transmission oil pan to prevent damage (A/T).
-
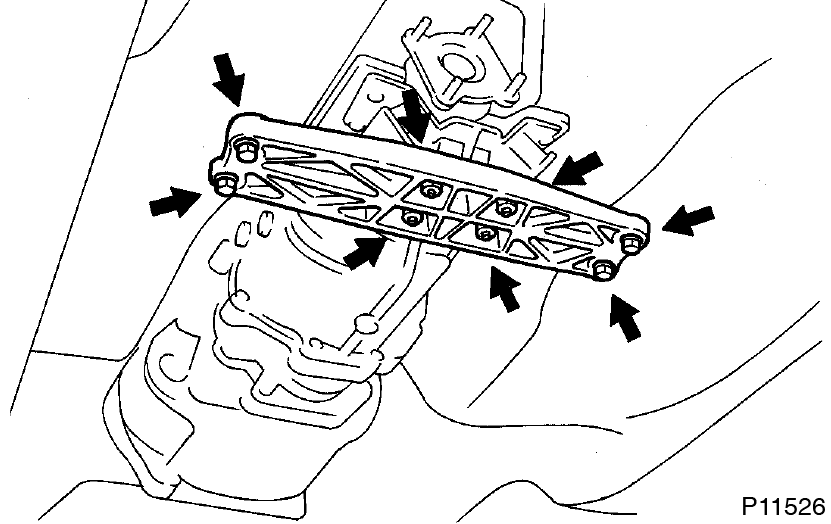
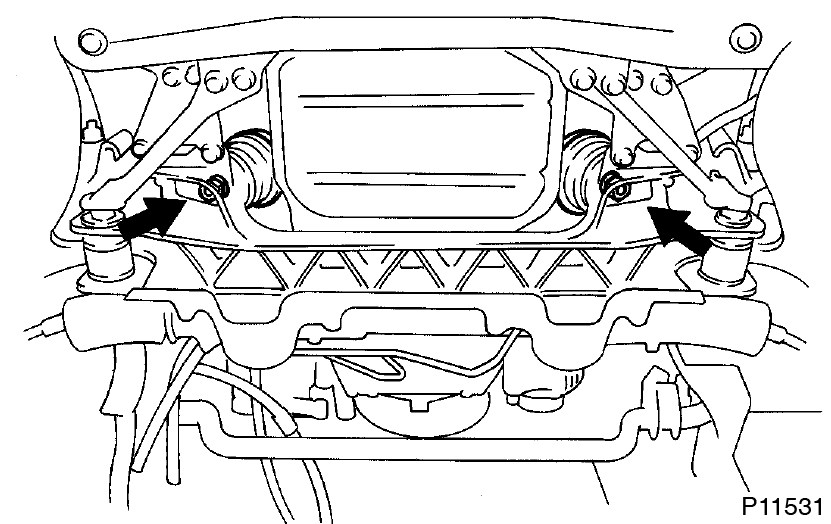
Remove rear support member
- Remove the 4 nuts holding the member to the engine rear mounting insulator.
- Remove the 4 bolts and rear support member.
-
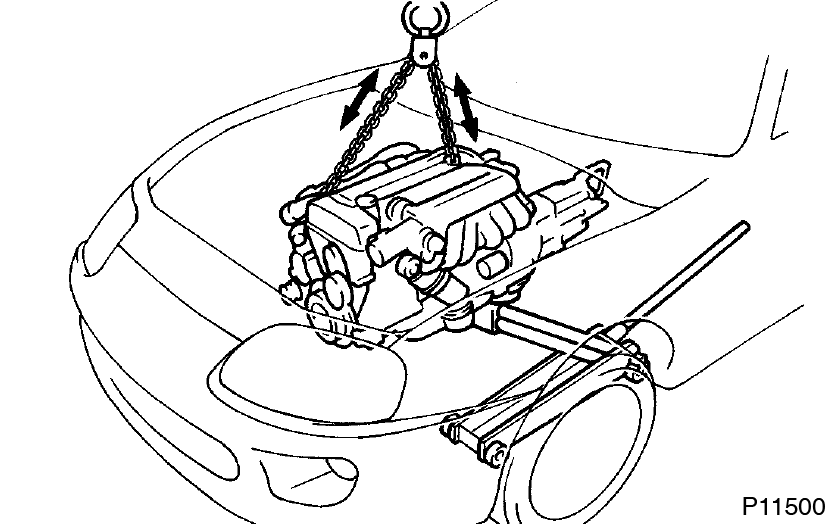
Remove engine and transmission assembly from vehicle
-
Attach the engine hoist chain to the 2 engine hangers.
-
Remove the 2 nuts holding the engine front mounting insulators to the front suspension crossmember.
-
Lift the engine out of the vehicle slowly and carefully.
 Remove the engine and transmission assembly carefully without damaging the shift lever retainer (M/T), A/C compressor or PS solenoid valve.
 - Make sure the engine is clear of all wiring, hoses and cables.
- Place the engine and transmission assembly onto the stand.
-
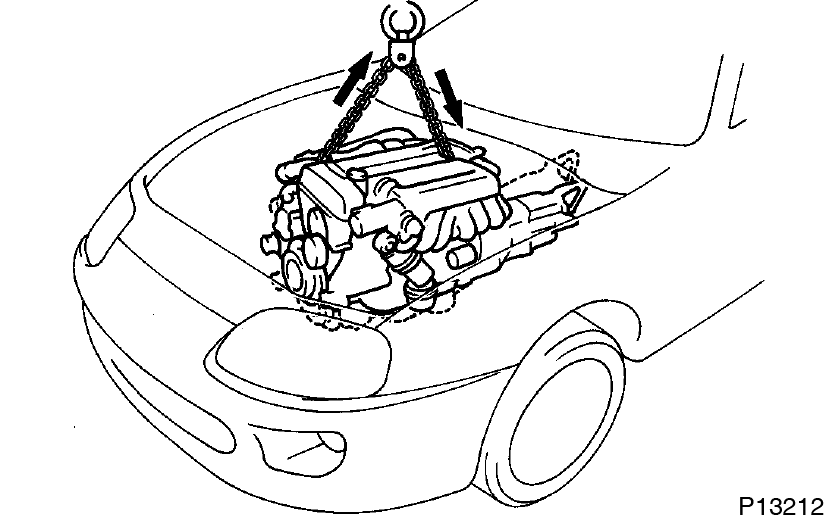
Attach the engine hoist chain to the 2 engine hangers.
-
A/T:
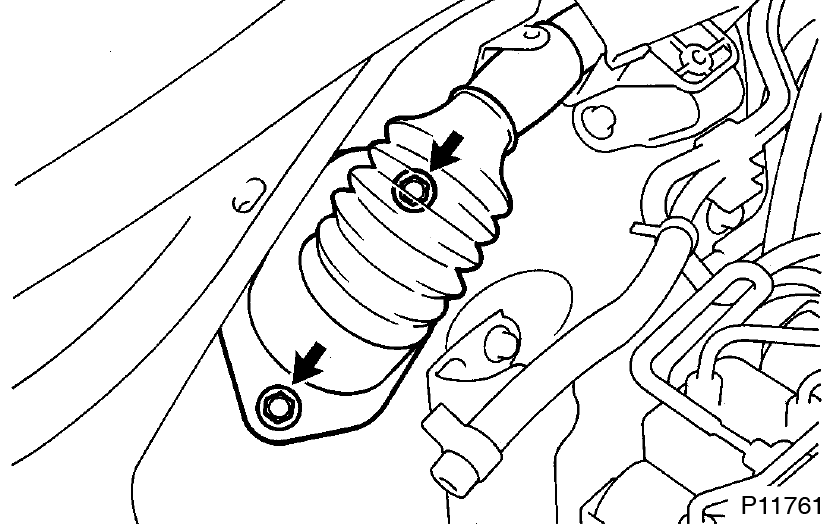
Remove oil dipstick and guide for transmission- Remove the bolt.
- Pull out the dipstick and guide from the transmission.
- Remove the O-ring from the dipstick guide.
-
Disconnect engine wire from transmission
- Disconnect the connectors.
- Disconnect the wire clamps from the brackets.
-
Remove starter
- Disconnect the starter connector.
- Remove the 2 bolts, wire bracket and starter.
-
A/T:
Remove oil cooler tubes for transmission- Remove the 2 hose clamp bolts and tube clamp bolt.
- Loosen the 2 union nuts, and remove the oil cooler tubes.
-
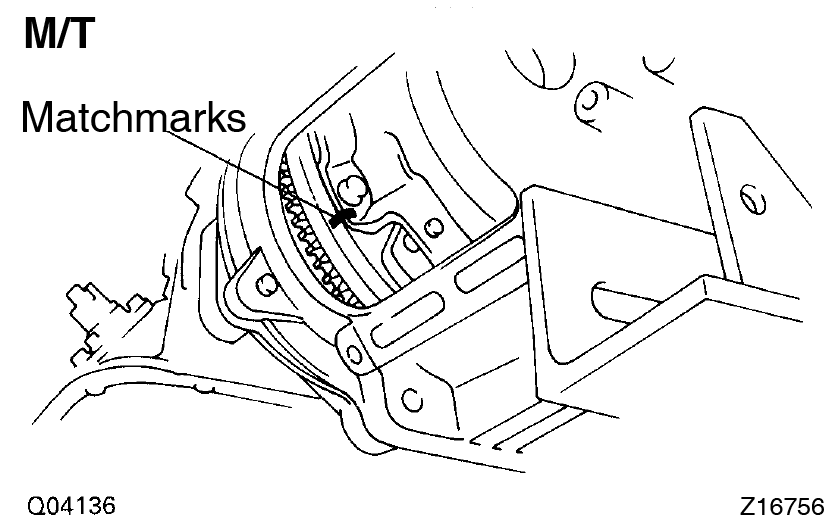
M/T:
Remove clutch cover set bolts- Remove the 2 bolts and service hole cover.
- Place the matchmarks on the flywheel and clutch cover.
- Remove the 6 bolts.
-
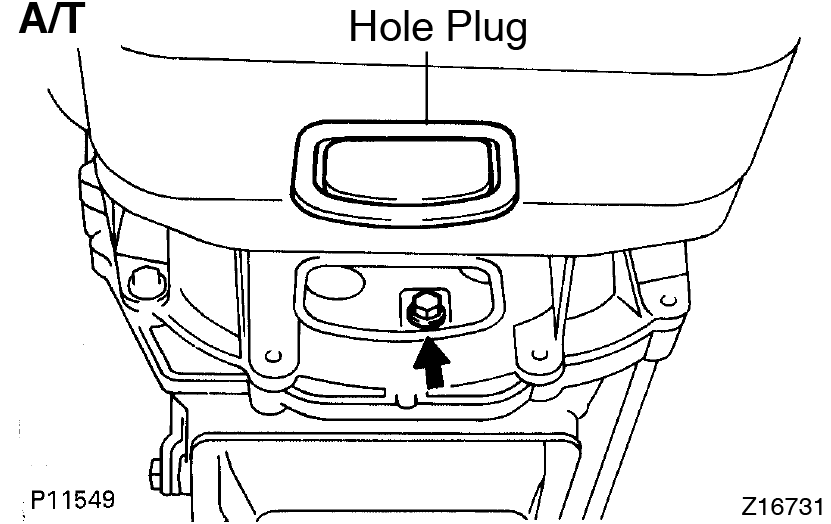
A/T:
Remove torque converter clutch mounting bolts- Remove the hole plug.
- Turn the crankshaft to gain access to each bolt. Remove the 6 bolts.
-
Separate engine and transmission
Remove the 6 bolts and transmission.
This guide is based on the book edition Toyota (RM502U, 1997)
Volksbibliothek, info@volksbibliothek.com
Back Next